Sacile 16 April 1809
While Napoleon had been distracted in Spain his old enemy Austria decided to take the chance to strike at him. The Austrian army had been reformed and rebuilt following its defeat in 1805 and their emperor was ready to take revenge for his country's humiliation. Whilst the main hammer blow was to fall in Bavaria there were also lesser attacks on French interests in Poland and Northern Italy and it was in the latter that the first battle of the campaign was fought.
Having read accounts of the battle in R. Epstein's Prince Eugene at War 1809 and F. Schneid's Napoleon's Italian Campaigns 1805-1815 I decided to give it a go.
Fortunately for me Frank Chadwick had included a scenario for the battle in his guide to the 1809 campaign for the Volley & Bayonet rules which I use for my refights.
Bit of an odd title considering that one of Austria's motivations for the timing of their attack was Napoleon's entanglement in Spain and that Britain was also involved and had agreed to subsidise the Austrian war effort and help in any way possible when hostilities broke out.
The Austrians under Archduke John entered Italy but made numerous detachments to hold strategically important points along their route so became hesitant in their movements unsure of what lay ahead. napoleon's Viceroy in Italy, Eugene de Beauharnais, gathered his troops and went to attack them. Inexperienced in high command he was anxious to prove himself and attacked before his army had fully concentrated. This scenario imagines he had waited a day so there is a chance for French reinforcements.
I simplified the scenery a little and set up the troops:

Turn 1 (9:00)
The divisions of Broussier and Grenier form up west of the stream.

While Barbou's division crosses and approaches the village of Fontana-Freda.
(Buildings are a Newline designs Roman granary and a couple of homemade jobs. Infantry from Esci & Italeri with Irregular Miniatures artillery support)

Whilst on the right Seras and Severoli's Italians move towards the high ground.

In the centre the Austrians mass to meet their foes (just in front of the least aesthetically appealing section of the table).

The Austrian right also waits to see how Eugene will approach them.
Turn 2
No reinforcements for the French. They continue to move towards their objectives.
Fontana-Freda.

The Austrians on the right are content to throw out a screen of Grenzers to snipe at the approaching columns.
Turn 3

Broussier (2nd Division) attacks the IX Corps on the Austrian right. (For those unfamiliar with my particular interpretation of Volley and Bayonet, they are brigade level rules and I represent each brigade with two stands. The single stands are skirmishers or artillery units. Strength points represent 500 men)
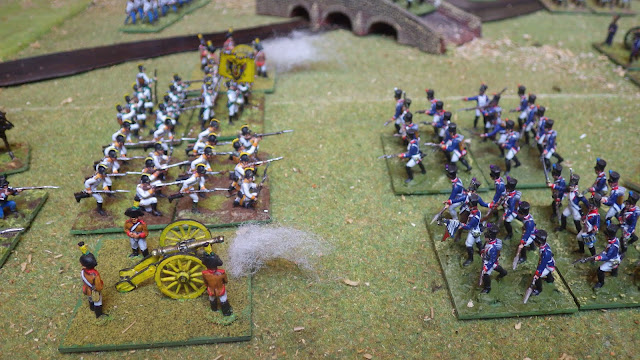
The Austrian gunners (Irregular Miniatures) extract a heavy toll on the attacking division and it takes serious casualties.

French Artillery (also Irregular) support Barbou's attack on Fontana-Freda.

The village is taken !

Severoli's Italians climb the hills but are too far away to support 1st Division (Seras) who take heavy casualties attacking uphill to their right.

Turn 4
Pully's dragoon division arrives and the French attack across the whole front.

The French reinforcements

Grenier's division cross the stream in support of Barbou's

General view of the table; in the distance the Italians can be seen ascending the heights.

The garrison of Porcia await them stoically. (Artillery from Newline Designs, Italeri infantry and staff of unknown origin).

The attack of Brousier's division on the right is repelled with heavy losses.
Turn 5
The failure of his main attack has given Eugene something to think about if he is to retrieve the situation this turn.

There are no further reinforcements but Grenier's 52e Ligne ford the river and receive a welcome boost as I realise I had missed the 102e off the ORBAT.

The yellow flag indicates that this unit has become disordered fording the stream.

The Italians launch their assault on Porcia.
Broussier pulls his battered units out of range and holds his position whilst the cavalry moves up in support and his artillery engage their opposite number in counter battery fire.
Elsewhere disordered units hold and rally.
For their part the Austrians consolidate their position and wait.
Turn 6
Still no reinforcements and 1st Division are driven from the hills around Palse.

Grenier moves to consolidate his foothold on the other side of the stream, challenging the Austrian centre. (Note I have hung up a tasteful throw to screen off the unsightly storage area behind the table)
The Austrians do very little this turn remaining content to surrender the initiative to the French, confident in strength of their position.
Turn 7

With a great fanfare Lamarque's 4th Division arrives to reinforce the French army.

The French surge forwards in the centre but pause to exchange volleys with IR53 & 62 in which they come off worse.

The increasing number of French batteries on their left causes the Austrians to loose a battery in the exchange of fire and on the other side of the table the Italians take Porcia through sheer weight of numbers. The Austrians withdraw to maintain a fusillade from the surrounding hills but to little effect.

To everyone's surprise the Austrians launch an all out attack on their right and in the centre where they overturn Grenier's division and send them running for their lives.

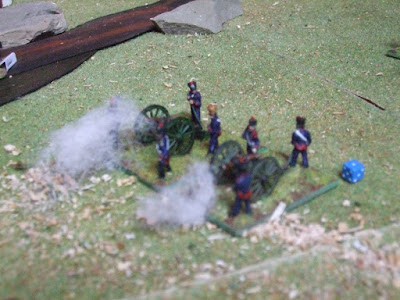
Close range canister fire from three batteries however has little effect and one is even lost to French musketry.
Turn 8

The French reinforcements cross the stream to bolster the centre before a desperate counter attack is launched in the hope of saving the situation.

Results are mixed. One brigade is destroyed demonstrating the inadvisability of frontally assaulting an artillery battery but their comrades are successful and overrun another battery. An Austrian brigade is also sent packing by the fury of the French attack.

On the French left the Austrian attack is beaten off with heavy losses.

On their turn the Austrians move to exploit the disorder and isolation of units in the French centre.

They are routed and the Austrian dragoons ride over the stricken Frenchmen to leave the centre a smoking ruin.

Whilst on the French left their misery is compounded by a further Austrian assault. Though less successful this attack removes two French batteries from play.
Turn 9
It is now 16:00 and things are looking pretty desperate for the French. The centre is in tatters and Broussiers division are 'exhausted' in game terms. Eugene has little left to play with and must surely write a grovelling letter to his step-father ! I should really call it a day but I play another turn to see if there is any chance left.

The French move less damaged units from the right towards the centre.

Unfortunately this relives pressure on the Austrian troops opposite them who are able to evict Severoli's Italians from Porcia.
Turn 10
The French are still trying to regroup but with evening drawing in there is little hope for anything other than ignominious defeat.

Sensing victory the Austrians surge forwards.

They drive the French from their last remaining gains.

Their light troops scurry from cover to begin the pursuit.(These are a cunning conversion from Esci British infantry, made before the HaT set was released).

It is over for the French and as in the historical battle they head back towards the Livenza river to lick their wounds.


